To start using the Expense module, you first need to set up:
- Expense Heads
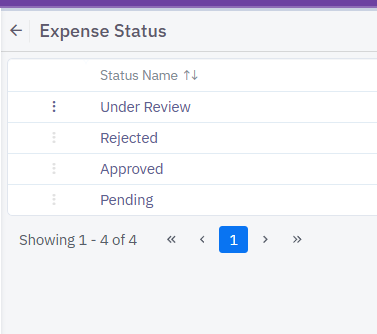
- Expense Statuses
Set Up Expense Head
Go to the Settings page.
- Click on Expense Head.
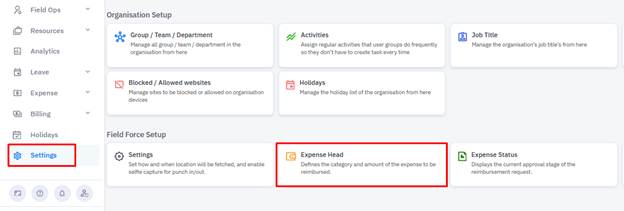
To add a new Expense Head, click on the Add button. |
|

|
|
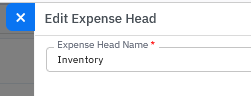
Note: Duplicate Expense Head names are not allowed.
Expense Heads that are already in use cannot be deleted.
Once created, the new Expense Head will appear in the list under Company Expense Head.
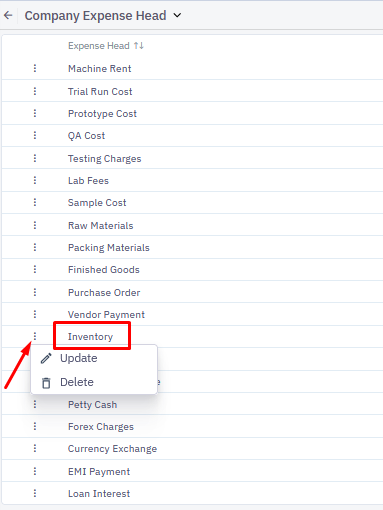
Edit or Delete Expense Head
Click the ellipsis (⋮) next to any Expense Head to:
- Edit/Update the name
- Delete it (if not in use)
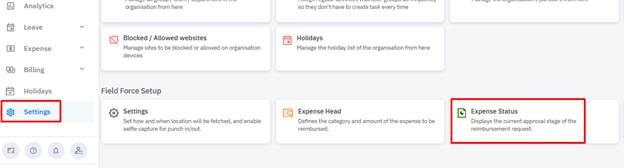
Set Up Expense Status
- Go back to the Settings page.
- Click on Expense Status.
- Click Add, enter the Status name, and click Create.
Note: Duplicate Expense Status is not allowed.
If an Expense Status is in use, it cannot be deleted.
First three default status are system generated and cannot be deleted.
Once created, the new status will appear under the Expense Status list.
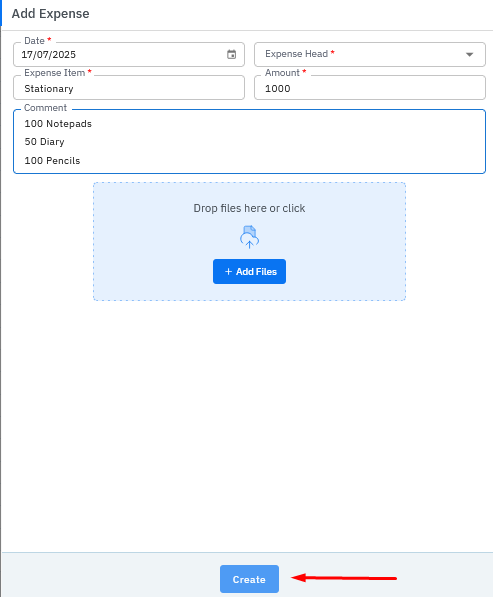
Adding a New Company Expense
On the Company Expense page, on the top right, you will find Total Number of Records and Total Amount. Next to it, you will find a Filter and Add button.

- Click the Add button.
- Fill in the following details:
- Date
- Expense Head (select from dropdown)
- Expense Item
- Amount
- (Optional) Comment
- (Optional) Attach invoice or voucher
- Click on the Create button to save the entry.
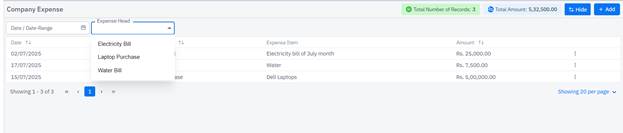
Filtering Records
Click the Filter button to filter expenses by:
- Date range
- Expense Head
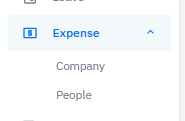
From the left menu panel, click on People
People Expense
- From the left menu, click on People.
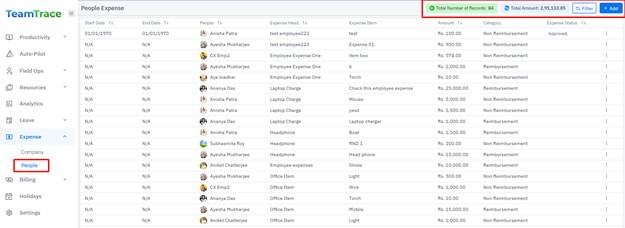
- On the People Expense page (top-right corner), you'll find:
- Total Number of Records
- Total Amount
- Filter and Add buttons
Adding a New People Expense
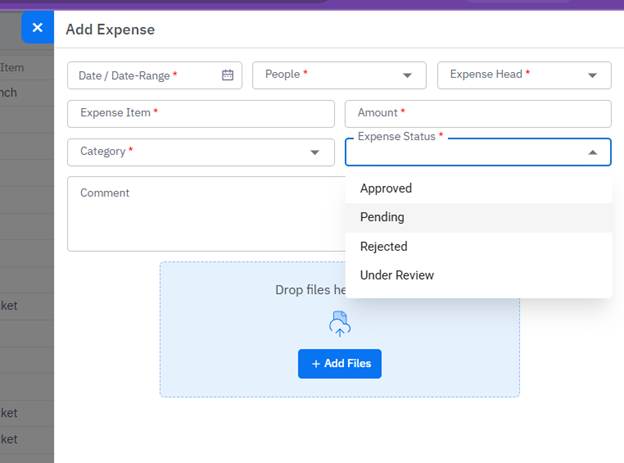
- Click the Add button.
- Fill in the following:
- Date range
- Person (select from dropdown)
- Expense Head
- Expense Item
- Amount
- Category (select from dropdown)
- Expense Status
- (Optional) Comment
- (Optional) Attach invoice, ticket copy, or voucher
- Click Create to submit.
Special Note for Travel Expenses
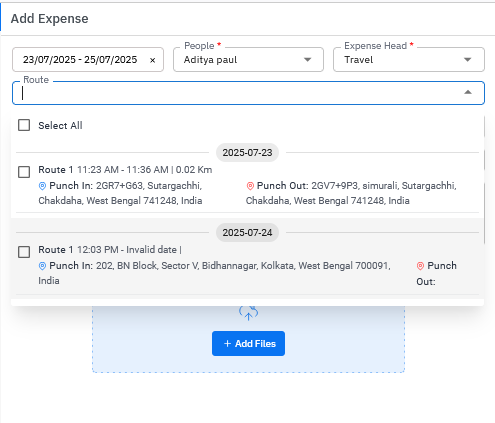
When you select Travel as the Expense Head:
- A new field called "Route" will appear.
- Select the route from the dropdown and proceed with the rest of the form.
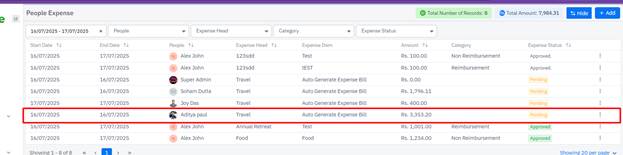
Once the Expense is added from the Fields Ops the default status is set to pending.
All reports generated under Expense > People and Expense > Company will automatically appear in Analytics > People Expense Report and Analytics > Company Expense Report, respectively.
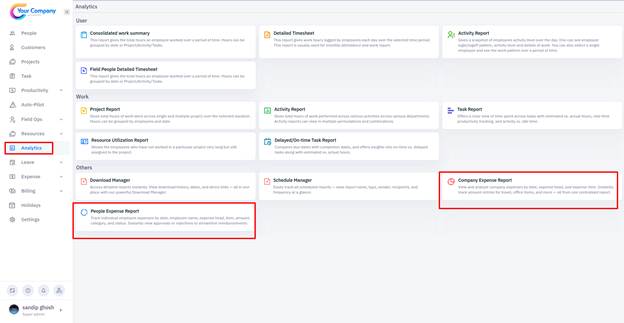
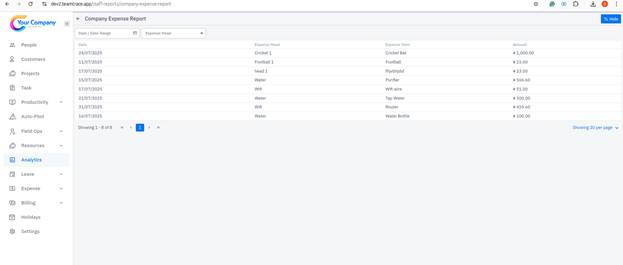
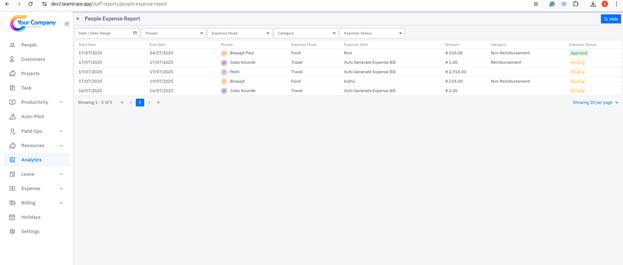
Please note that the Reports section is strictly for viewing and filtering data—no other actions (such as editing or exporting) can be performed from this section.
How to Add Travel Allowance (TA) for a Field Employee
Enable Field Tracking
- Navigate to Settings.
- Click on Enable Field Tracking.
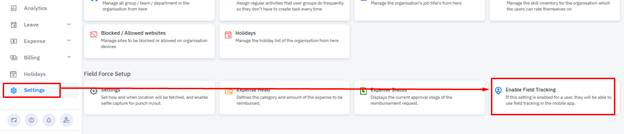
Add Travel Allowance
- On the Enable Field Tracking page, locate the specific employee.
- Click on the TA (Travel Allowance) field next to the employee's name.
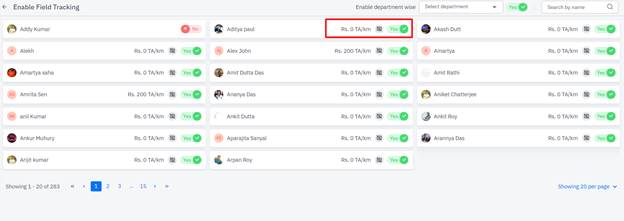
|
|

Verify TA in Field Ops
- Go to the Field Ops section from the left-hand side menu.
- Click on People.
- Click on Generate Bill

4. Once the bill is generated, it will display the same.

5. Go to People Expense or People Expense report to see the calculated amount.
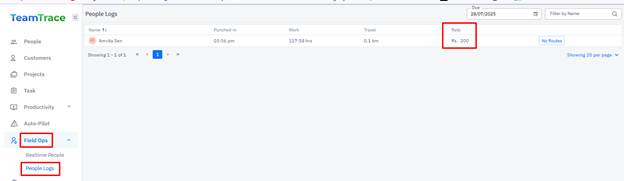
Was this article helpful?
That’s Great!
Thank you for your feedback
Sorry! We couldn't be helpful
Thank you for your feedback
Feedback sent
We appreciate your effort and will try to fix the article