You can easily integrate your Bitbucket account with a project in TeamTrace to streamline your development workflow. Follow the steps below to set it up.
Step-by-Step Guide to Connect Bitbucket
1. Create a Project
Go to Project from the left-hand menu.
Click on Add Project.
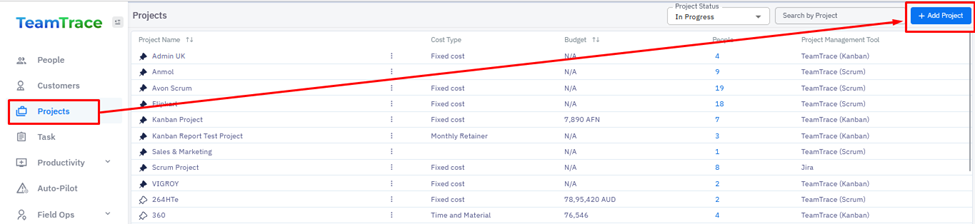
In the Add Project form:
Enter the required project details.
Click the Add Project button at the bottom of the page.
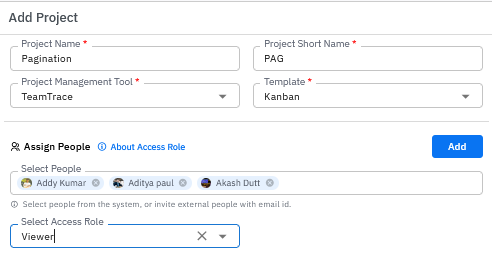
| Click the Add Project button at the bottom of the form. |  |
Access Project Settings
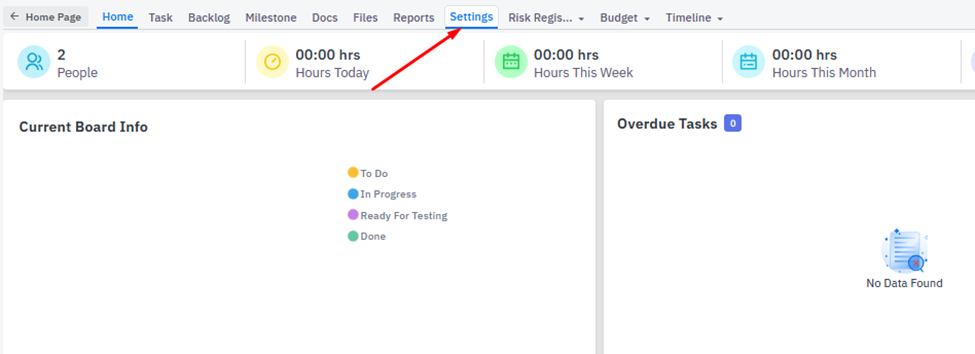
Once the project is created, click on the Project Name to enter the Project Dashboard.
From the Project Dashboard, click on Settings (usually found in the top navigation bar or side menu).
Navigate to Integrations
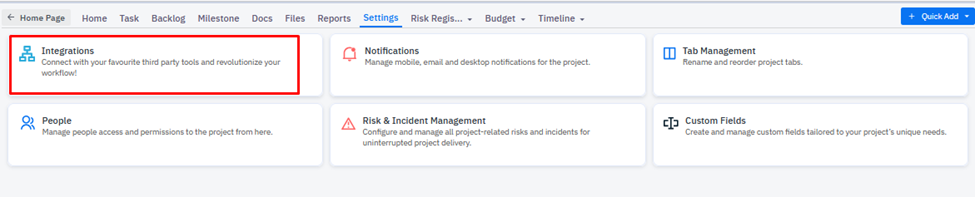
On the Settings page, click on the Integrations tab.
Select Bitbucket from the list of available integrations.
Connect Your Bitbucket Account
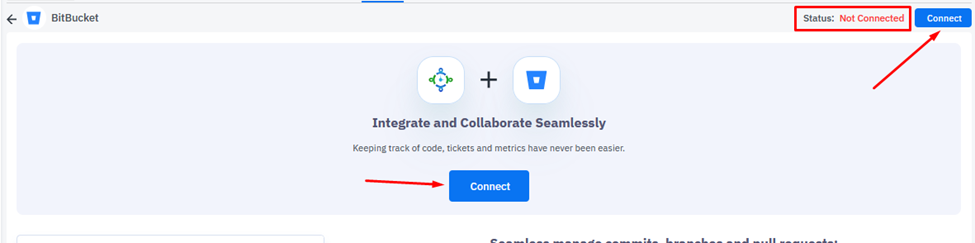
On the Bitbucket integration page, you’ll see the status: Not Connected.
Click the Connect button.

Authorize Access
On the BitBucket page, you can see that the status is showing Not Connected.
Once you click on connect, a pop-up window will appear prompting you to sign in to your Bitbucket account.
Follow the prompts to authorize your BitBucket account.
Once signed in successfully, the status will change to Connected.
Was this article helpful?
That’s Great!
Thank you for your feedback
Sorry! We couldn't be helpful
Thank you for your feedback
Feedback sent
We appreciate your effort and will try to fix the article