Git Integration in Teamtrace
Signup on Github.
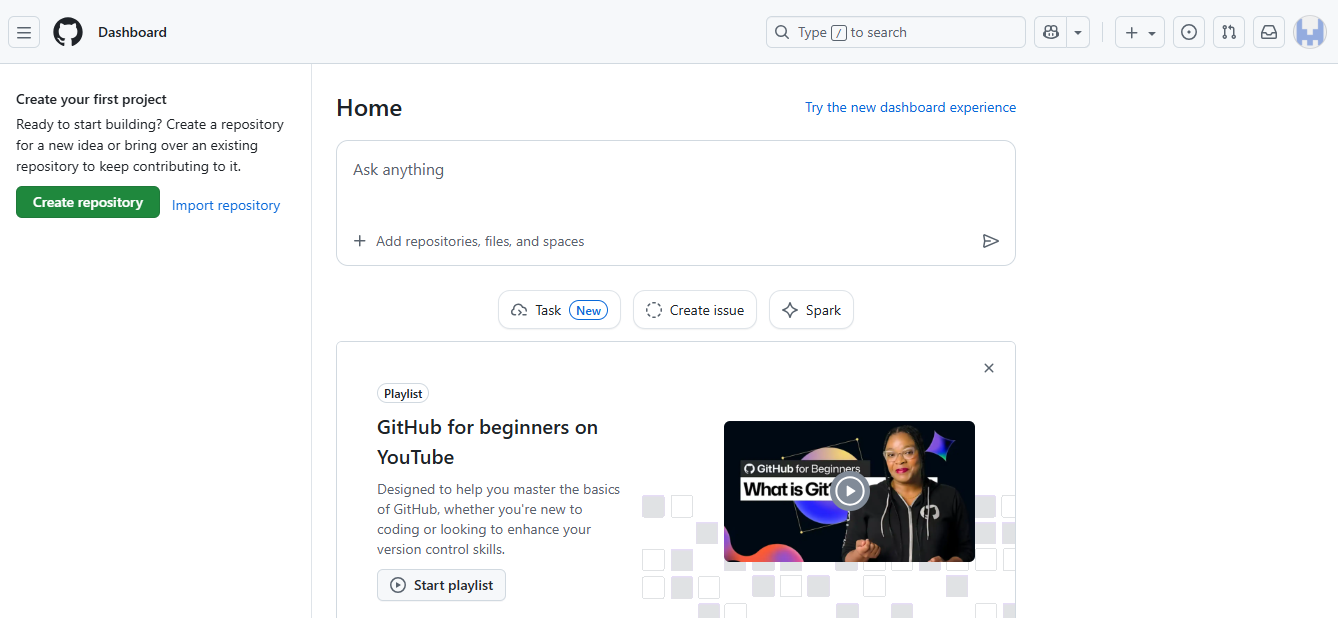
Create a Repository.
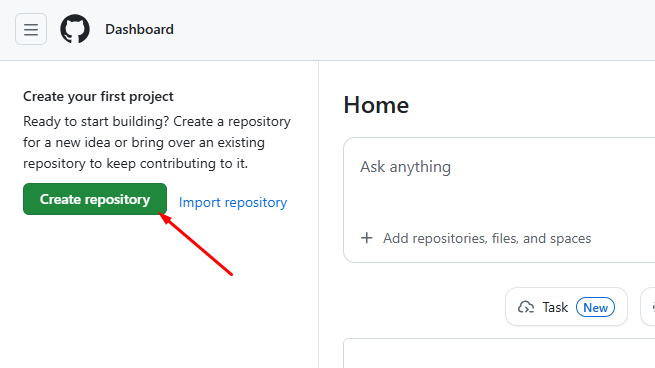 Click on Create repository.
Provide a name, change Visibility to Private, and turn the README to On.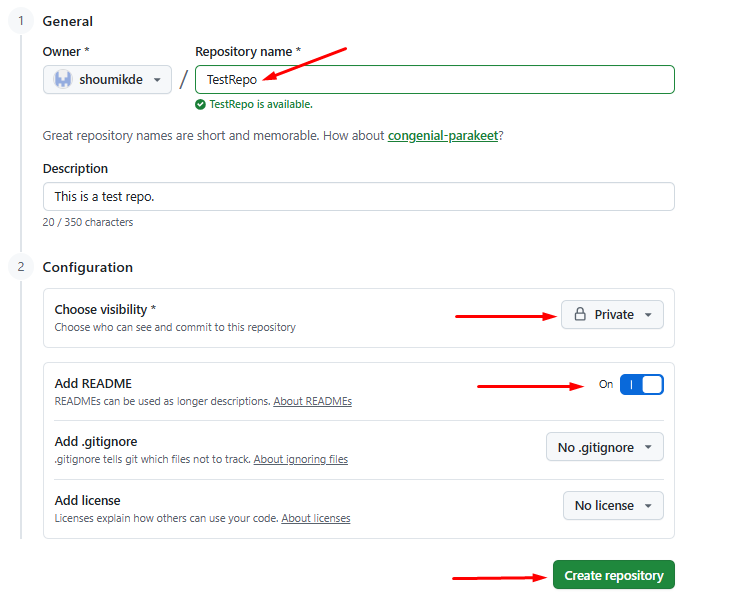
Note: You can choose to ignore Add.gitignore however, it is recommended to use this option.Install in the Teamtrace from Marketplace in Git-Hub.
Click on the three bars on the top left side of the page. Click on Marketplace.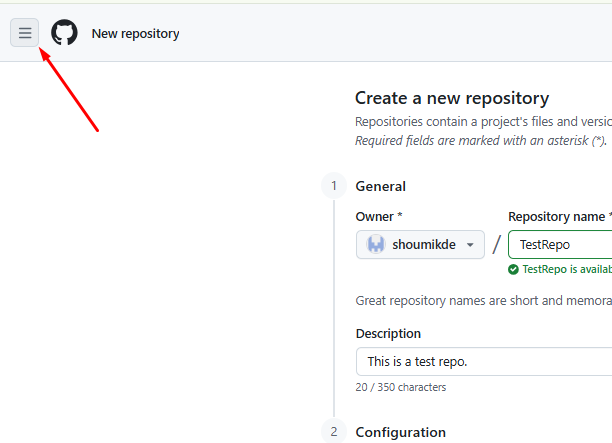
Once in the Marketplace, search for TeamTrace. 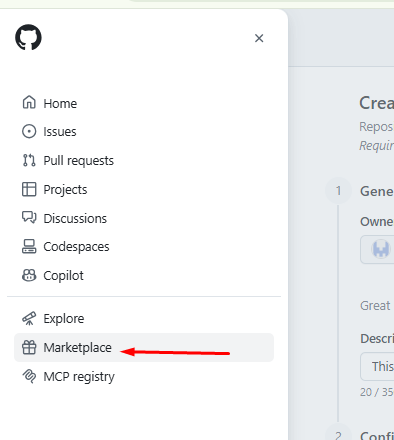
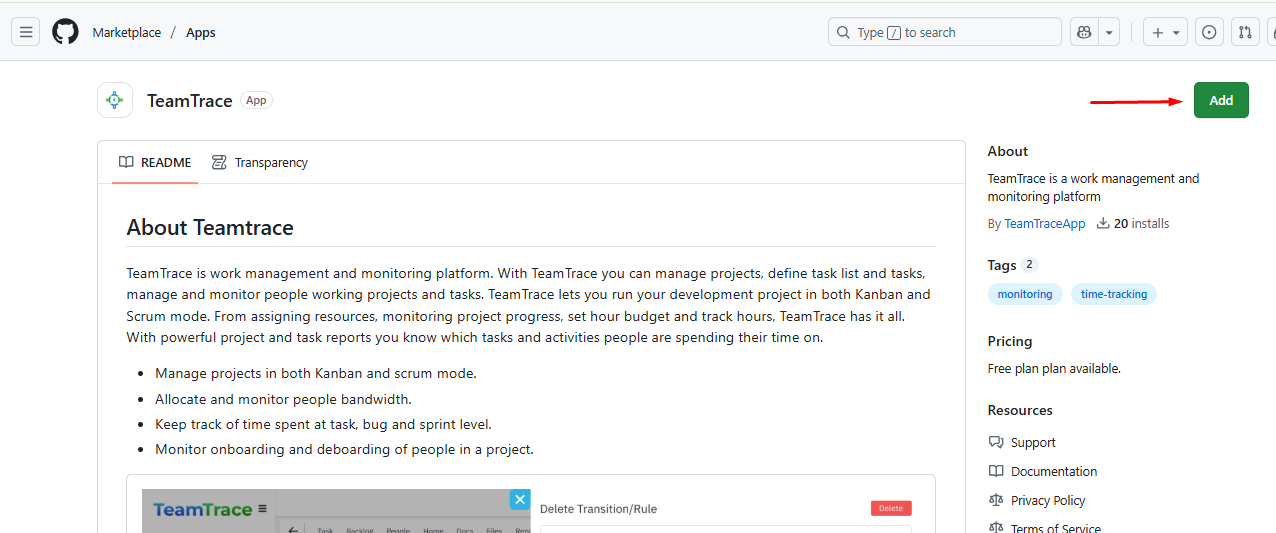
Click on TeamTrace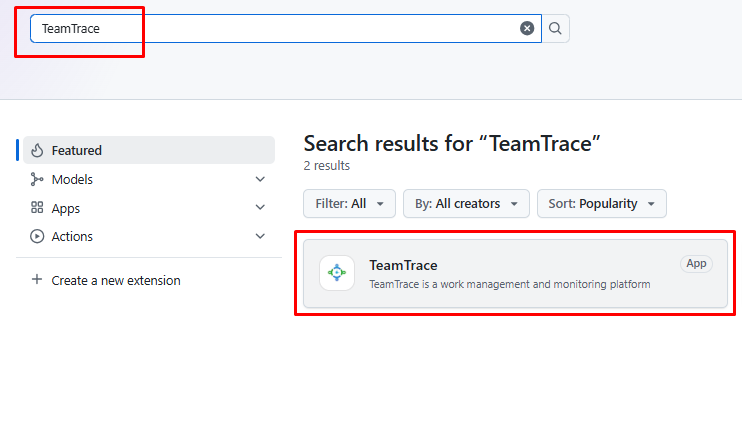
And click on Add
Click on Install for free. 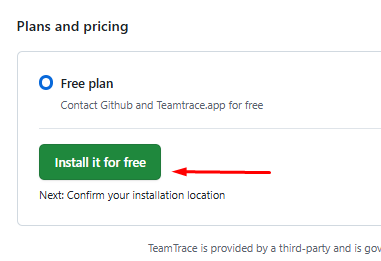
Fill in the required information and follow the instructions.Go to Teamtrace web portal, from the left panel click on Project.
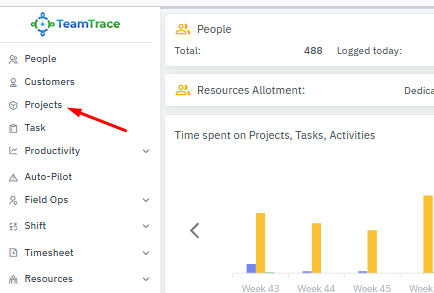
Go to the desired project or create a project. From the Project dashboard click on Settings.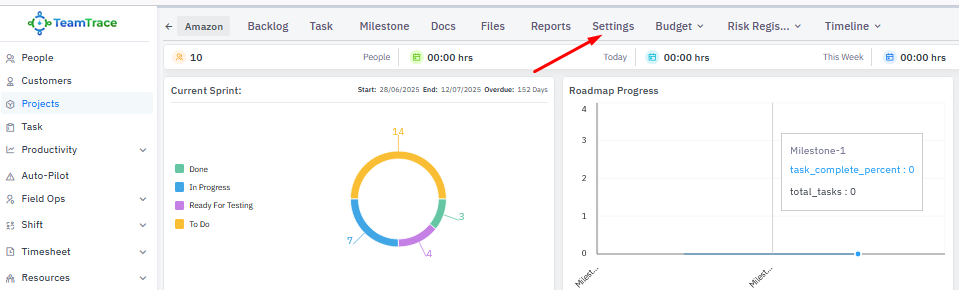
From the Settings page click on Integration.

On the GitHub page, click on connect. You will get a Pop-up window asking you to log in to GitHub, and after logging in, you will need to authorize the TeamTrace App.
Once the app is authorized, go back to the TeamTrace portal and create a ticket. Copy the ticket number, create a new branch in the Repository.
Commit changes in read.me file and execute the create pull request to the Merge process.
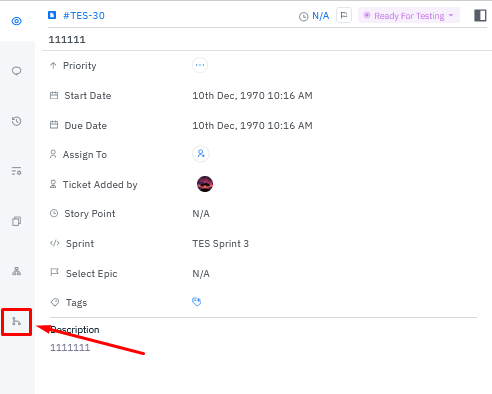
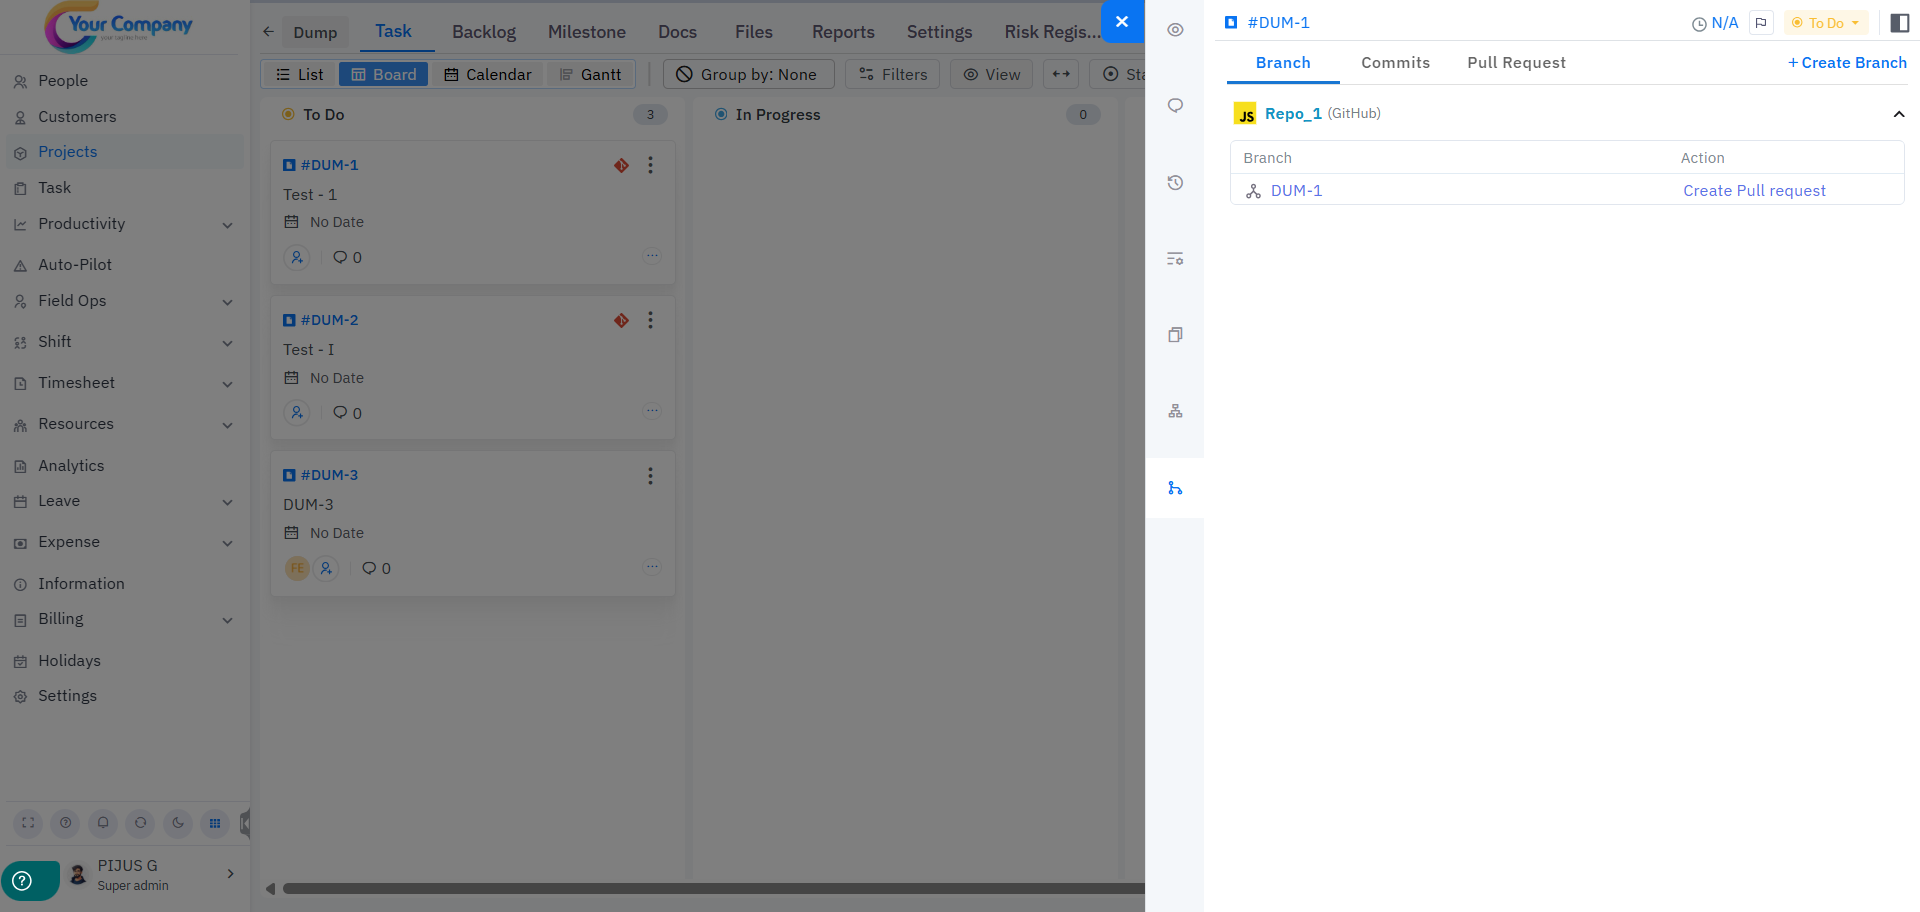
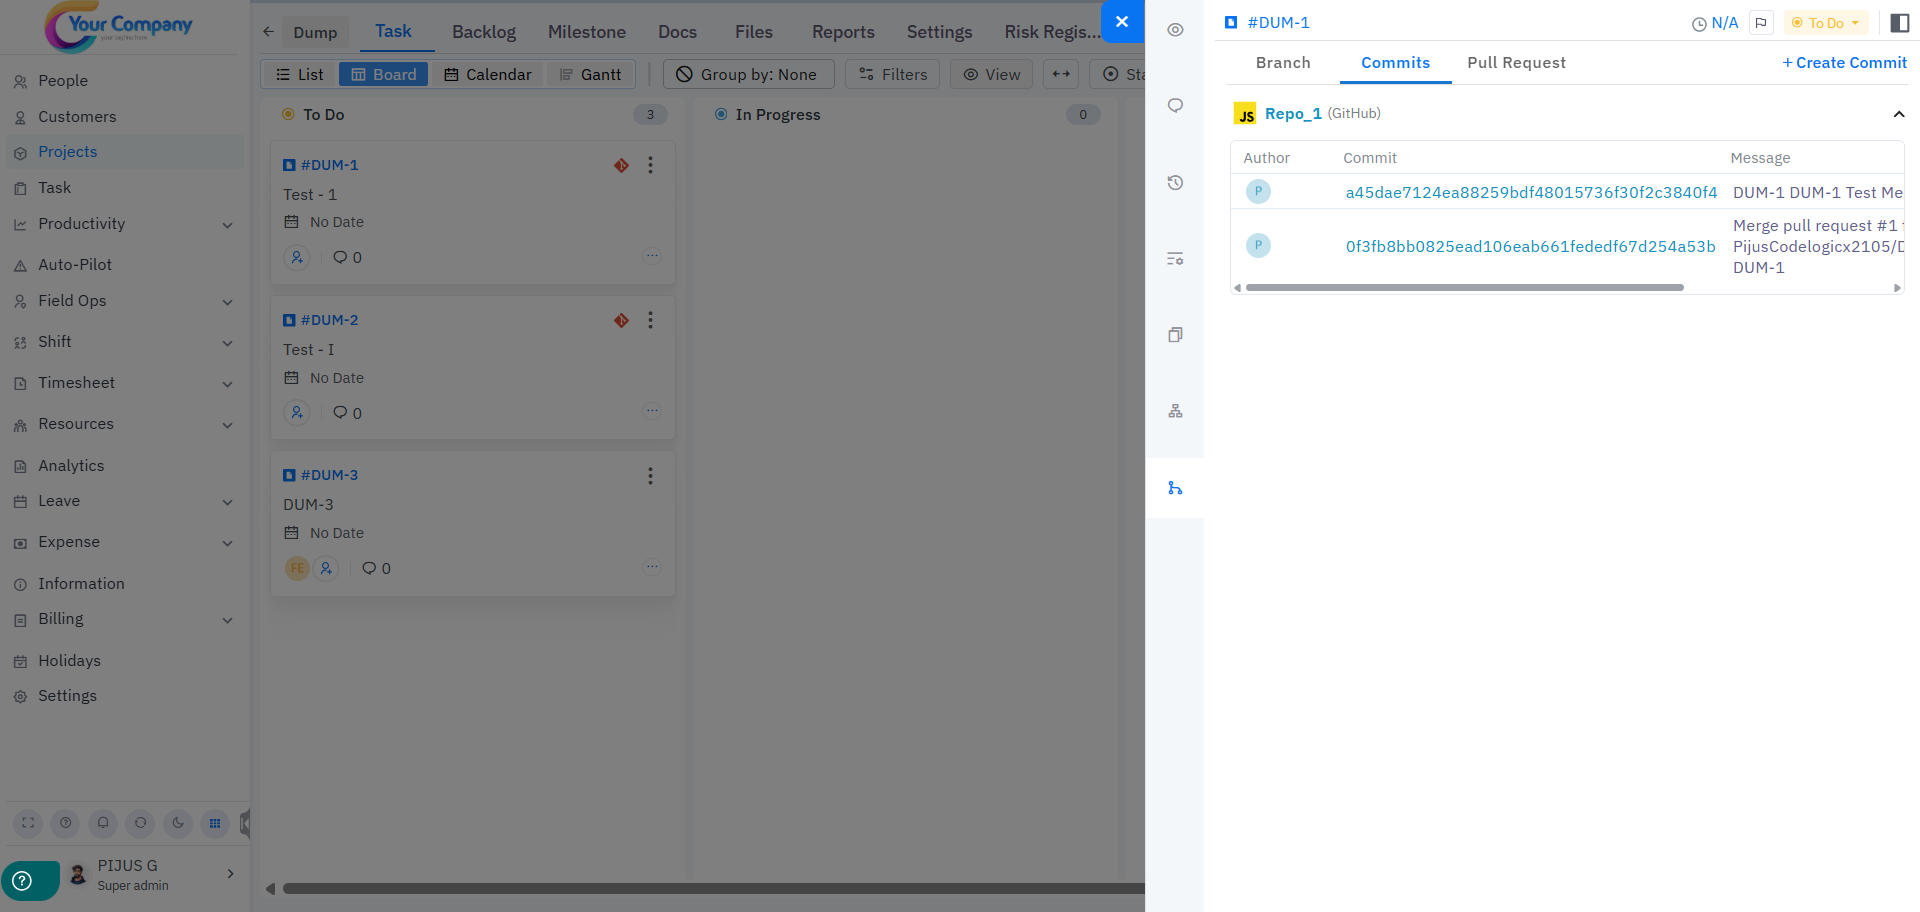
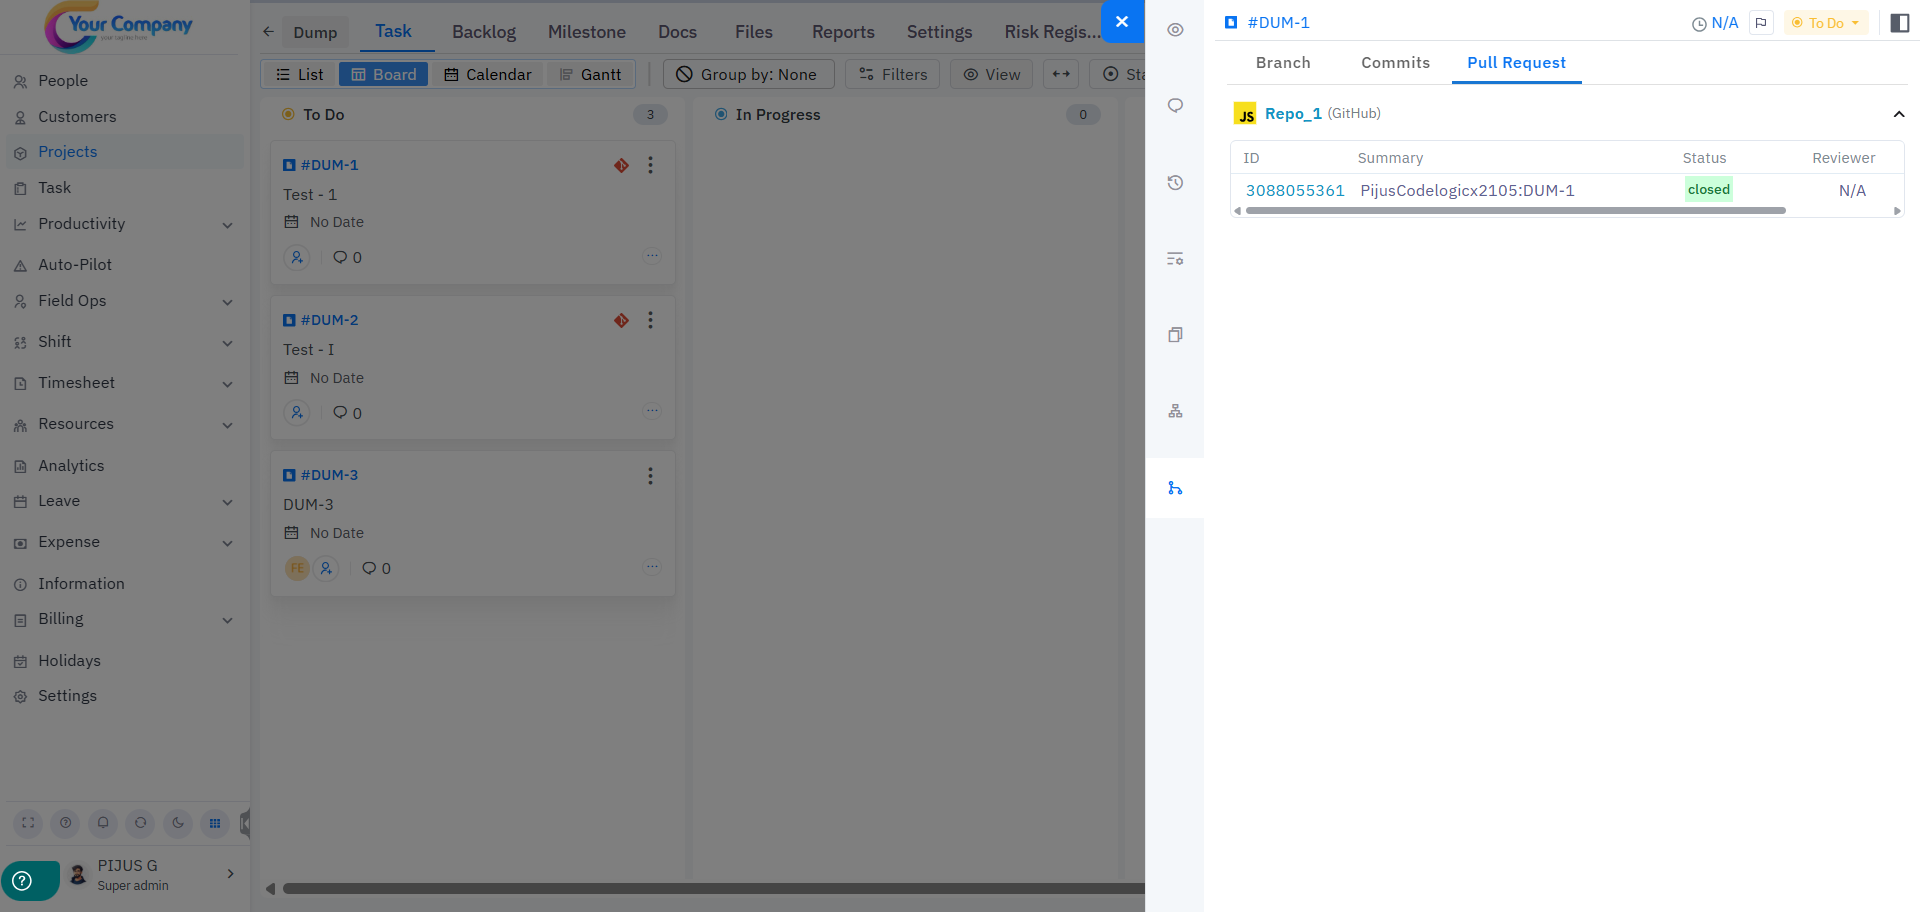
Go back to TeamTrace portals, and go to the ticket you created. Click on the Git section to access the Branches, Commits and Pull request tabs.
Was this article helpful?
That’s Great!
Thank you for your feedback
Sorry! We couldn't be helpful
Thank you for your feedback
Feedback sent
We appreciate your effort and will try to fix the article